
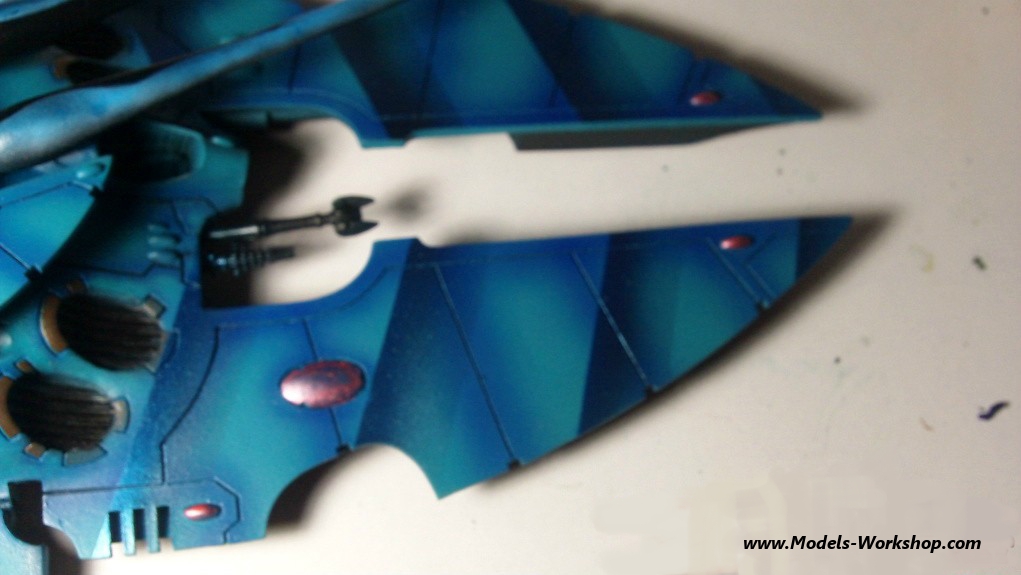
Masking is an essential skill when it comes to pulling off some of the nicer looking techniques with airbrushing. Normally the hardest part of the affair is to get the tape to lay down flat. One you are able to spray using mask properly then items like this one are really easy to do. A mask can be anything that you use to shade a part of a model. This can be anything from masking tape, masking fluid holding a shield while spraying, or even Silly Putty. There are tons of effects you can pull off while you have a model masked off so this is something that is really important to practice. You can work on a flat surface at first and then move on using masks on your models. To pull off the effect I did in the video, the faded tiger stripes practicing basic airbrush blending is a great idea. I used:
- DeVilbiss DAGR Airbrush (.3mm tip)
- Harder and Steenback Infinity Airbrush (.15mm tip) (Review Found Here)
- Vallejo White Surfacer/Primer (Review Found Here)
- Createx Transparent Ultramarine Blue
- Createx Wicked Color Airbrush Thinner
- Createx Wicked Color Metallic Blue
- Blue Duck Brand Masking Tape

 Here are a couple of tips:
- De-tact the tape slightly by tapping it on your shirt, this will pick up lint to make it slightly less sticky
- You can also use a hairdryer to remove masking tape easily, but watch out on resin and thin plastic pieces
- If you spray the base color down (of clear if over a fade) it will help seal the mask to the model and seal up any gaps
- Low pressure is best so you do not force air (and paint) under the mask.
httpv://www.youtube.com/watch?v=H9GEqShSPmc
If you have any questions or would like to make a request you can get a hold of me at larry@models-workshop.com