
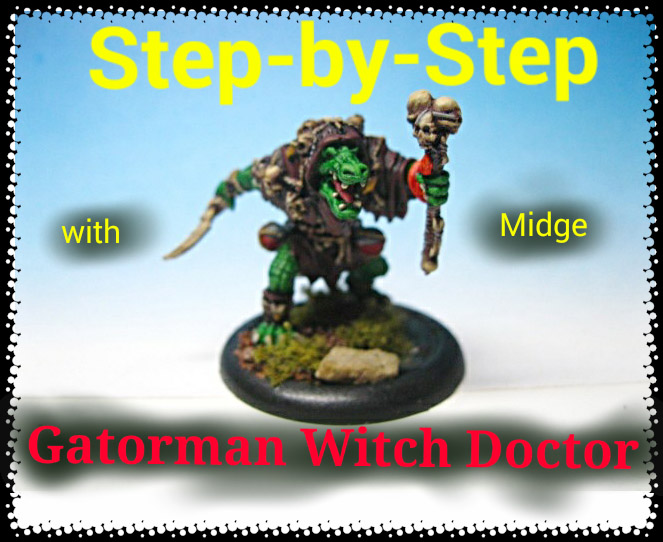
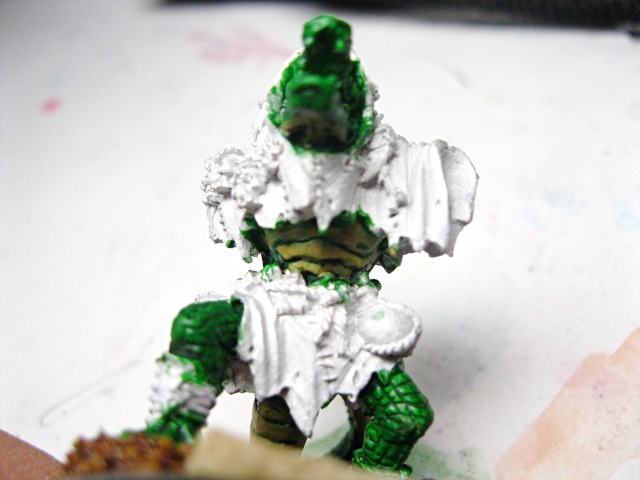
Well ladies and gents, here is the first of what I hope to be a semi-regular feature on the site, Step-by-Steps by yours truly! One of the big projects that I have been working on recently has been a large number of Hordes Minions models for my current commissioner. One major surface areas you run into when working on this particular army is the multitude of scales these nasty lizards have. I also realized when I started my pre-planning for the models that it would be incredibly easy for all of the models to come out looking very similar, providing little contrast on the table-top. I had a block of three Gatormen Witch Doctors as part of this lot, one I painted in an albino scheme which I wont be covering in this tutorial, but the other two I wanted to do in various shades of green. My ultimate goal was to have the three models tied together by the details, i.e. leather cloaks and skulls and armaments, but to have each one having a very different skin color when standing next to each other. So here we go! As I side note I am mostly working with old Citadel paints so those will be the ones I refer to in this article. I found a really handy paint comparison chart over on DakkaDakka sometime ago which could be useful for you folks using different brands of paint. You can find that chart here.
Step 1:
For the first model I gave it a nice base coat of Snot Green. 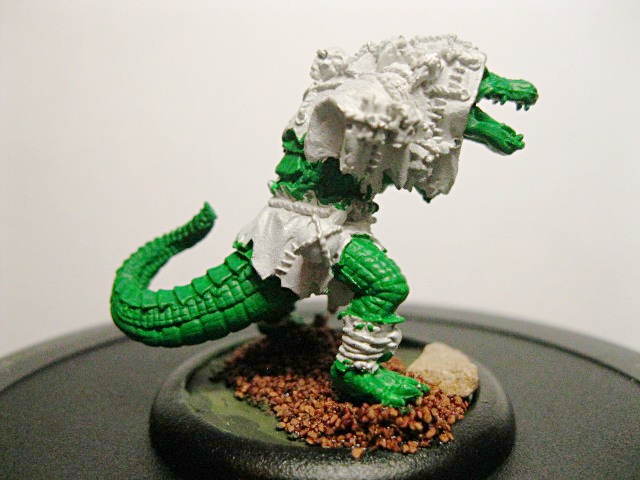
The second guy got a base coat of Dark Angels Green.
Step 2:
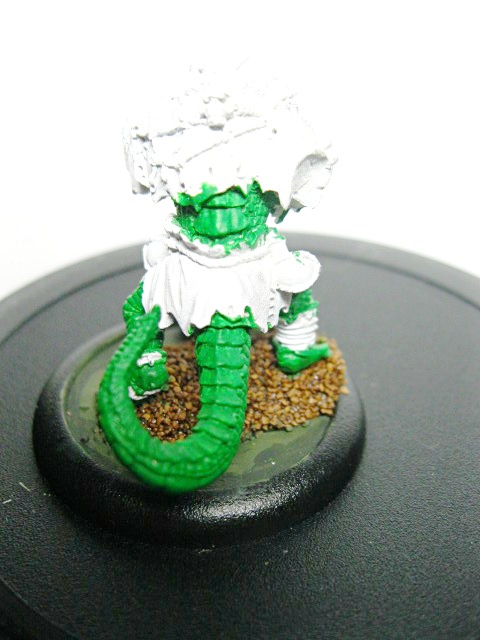
Time for washes folks! I absolutely love how easily you can add soooo much depth just with a liberal wash! For the first guy I added two layers of Thraka Green Wash. Make sure you allow the previous layer to dry all the way before adding the second layer.

For the second fellow, who if you haven’t picked up on it by now, I wanted to be a much darker shade of green. I used a 1:1 mix of Thraka Green Wash and Devlan Mud Wash. Again I gave the piece two washes, allowing the first to dry
completely before adding the next layer.
With that the washes are complete. From here I moved onto the underbelly.
Step 3:
I decided that the underbelly on these pieces was very important for contrast, so I really wanted it to pop. For the first guy I used a layer of Desert Yellow.


For subject number two, I used a 2:1 mix of Dark Angels Green and Goblin Green.


Step 4:
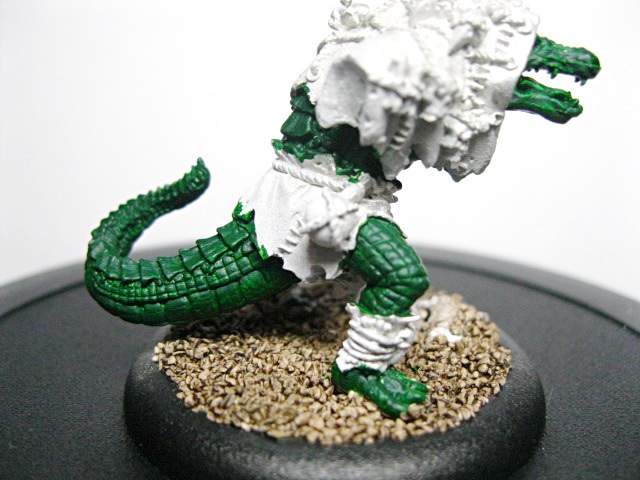
After getting the base layer of the underbelly down I moved onto the mid-tone for each of the models. For the first guy, the lighter of the two, I added a layer of Desert Yellow and Bleached Bone in a 1:1 mix. This step immediately begins to add depth to the underside of these models.


For the darker of the two models I added a layer of a 2:2:1 mix of Snot Green, Goblin Green, and Dark Angels green. It needed just a bit of that darker green provided by the Dark Angels Green to keep the layers from being to drastically different.


I am sure that this goes without saying, but be cognizant of where your light source is coming from and use that to direct where these mid-tone highlights are supposed to go. Make sure that there are places where the layer before is still visible as that will give you the depth that you are seeking.
Step 5:
This step moves onto the final highlight on the the underbelly sections of both models. I have found that you can really achieve some great results on these lizard guys with just a couple of layers of highlighting. So for the guy with the light underbelly I finished off with a hightlight of 2:1 Bleached Bone and Desert Yellow.


For the darker Gatorman I did a final highlight of 2:1 Snot Green and Goblin Green. Be careful how much of that Goblin Green you add to your mix. It really doesn’t take much to lighten that mixture up to a good highlight and you don’t want it to get to stark.


Step 6:
There are sooooo many ways that one could use on the scales for these shamanistic lizards. Some might approach it with a dry brushing technique, but I chose to do hardline highlighting. I made sure to feather the different colors onto the top of the model, on the larger scale plates, but for the smaller scales on the legs, arms, and sides, I just added the highlight layers to reflect the overhead light source. Again in this step I started with the lighter of the two models. For this fine fellow’s scales I started with a mid-tone of Snot Green.


For the darker fellow I started layering up back to the original color of Dark Angels Green. This should really be a visible difference in contrast to the dark base brought about by the wash, I however had a harder time capturing it in photo. Just paint the Dark Angels Green on in the same manner you did the lighter guy above and you will see the contrast.

Step 7:
As with the underbelly, I stopped with a second layer of highlighting on both of these models. You will find that if you try to do more than that, you will simply begin covering over previous layers, causing your highlights to become too contrasting. You simply don’t have enough room on those small scales to put more than two layers. For the lighter Gatorman I used a final highlight of straight Goblin Green.

For his darker compatriot I used a final highlight of Snot Green.


 This step concludes the work on the organic part of the Gatormen until later down the line when we will start working on details. At that time we will come back to the teeth, claws, and eyes.
Step 8:
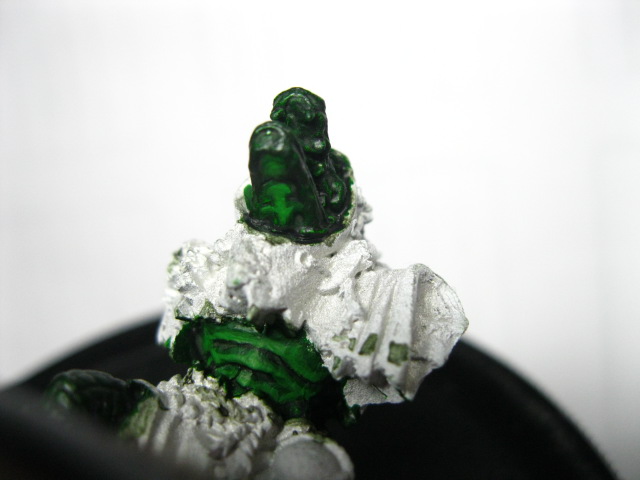
Up until this point everything I have done on these models has been done to make them look different, individual. From his point on the steps I take will be made to tie them together. I was on a roll with these models when I took the photos for these steps so sometimes I snapped photos of the darker Gatorman and sometimes I took photos of the lighter one. Rest assured that the steps taken were the same for both models. So onward and upward. In speaking with my commissioner the decision was made to stick with a leather feel for the hoods and loin cloths. Seeing as he knows the fluff and background of his army a bit better than I do, he wanted to really convey the primitive nature of the Minions in the Gatorman’s attire. These folks live in a swamp and as such aren’t prone to working with textiles, so leather it was to be. I started by applying a base coat of Scorched Brown to the leather areas.


Step 9:
As with the scales and organic parts of the gator, I moved onto a wash for the next step. With this leather I really wanted it to have a dark and grimy feel to it so I applied two coats of straight Devlan Mud. Again it is important to allow the first coat of wash to dry completely before applying the second.


Step 10:
Working with leathers is sometimes difficult as leather catches light differently than fabrics. To help achieve this I worked up through three more layers to final product from this point. I began by bringing areas the most exposed to light back up to the original color, Scorched Brown.


I love the first step in a series of steps were you really start to see where the model is going to go, how the final look starts to come together.
Step 11:
Moving onto the next highlight layer I applied a thin layer of Scorched Brown/Doombull Brown in a 2:1 mix. It began to provide a subtle highlight for the leather.


step 12:
This step will finish off the leather. For a final highlight I used the same colors as in the previous step I just reversed the ratio, using a 2:1 mix of Doombull Brown:Scorched Brown.


That does it for the leather folks! from here we are onto detail work of which there is a lot on this model.
Step 13:
Since The skulls and bone weapons are such a predominant part of the model I began with those. I started with a base coat of Khemri Brown. I for one love the Foundation paints from Citadel. I think they really hit the nail on the head with these paints and they give great coverage.


Step 14:
My bone recipe calls for two separate washes, the first of which is actually a homemade wash using Chaos Black and Scorched Brown. I used some of Windsor & Newton’s Glazing Medium to help with watering it down.


Step 15:
Next wash, strange as it sounds, is a very light Leviathan Purple wash. I have found that this particular wash has really become one of my go to washes to provide depth on things. It isn’t as stark as a Devlan or Badaab wash but it still provides a bunch of shading.


Step 16:
In the next step I started to layer up highlights on the bone. I started by bringing the non-recessed areas of the bone back up to Khemri Brown.

It’s very important that one edge of the bone blade to feather in these subsequent highlight layers. You want to be giving the impression of a sharp edge that has been ground on a stone to attain that edge. There will be definite striations of color in there.
Step 17:
I then worked the highlights on the bone up over several thin, watery layers, adding more and more Bleached Bone. The final mix was about a 3:1 Bleached Bone to Khemri Brown mix.


At this stage of the game I also painted the beaks on the bird skulls with a base coat of Tausept Ochre.
Step 18:
I finished off the bone areas with a light wash of Gryphonne Sepia Wash. I made sure that this wash was very translucent, adding lots of water.


This wash helps to dirty up the skulls, making them look like they have been exposed to the elements for some time. At this time I also added a final highlight to the bird skull beaks with Iyanden Darksun.
Step 19:
From there I moved onto the small vials that the Gatormen have hung at their belts. I usually work from the bottom up on models, by that I mean this: I usually start with the details on the bottom and work my way up. In this instance the ropes pretty much cover everything else so I will be doing those last. To start on the vials I base coated them in a 1:1 mix of Codex Grey and Regal Blue. It came out looking like so:

I then painted in the liquid line. I thought that a vile looking red potion in these beakers would add some great contrast so I started with a Scab red base coat for that.

Step 20:
I needed to add some shading to these so I mixed up one of my favorite wash mixes, a 1:1 mix of Badaab Black and Asurmen Blue and gave the whole surface of the vials a liberal wash, focusing the wash down into the recesses.


Step 21:
Next step up on these guys is to start bringing up the highlights. For the Vial I added a layer of Fortress Grey and for the liquid part I added a highlight of Blood Red.


Step 22:
The next highlight layer was a layer of Space Wolves Grey on the vials and Blazing Orange on the liquid.


Step 23:
To finish out the vials I added a few sparse pure Skull White spot highlights to the vials where light would be directly hitting them.


Step 24:
Things really get rolling now. As you can really start to tell the model is getting close to complete. I added a base coat of Desert Yellow to the ropes.

Step 25:
Then a wash of Ogryn Flesh was added to give them some depth.

Step 26:
I then finished them up with a highlight layer of pure Bleached Bone.

Step 27:
I will cover a few things here in this step, the first being the snake wrapped around the Gatorman’s wrist. I applied a basecoat of Blazing Orange and then simply washed the thing in Baal Red. Short, sweet, and simple but it makes it pop as a nice element of contrast. I then base coated the teeth and talons with Gorthor Brown. Finally I applied a single layer of Tuskgor Fur to the tongue.

Step 28:
In this step I added a final highlight of Bleached Bone to the tips of the teeth and talons.

Step 29:
I really wanted the eyes on these guys to pop, so for both of them I used a base coat on the eyes of Iyanden Darksun.

Step 30:
Yes, yes I suppose I could have put this little bit of information in the step above but it satisfies my OCD brain to have an even number of steps in the tutorial. I finished the eyes but putting a very small dot of Chaos Black in the middle of the iris.

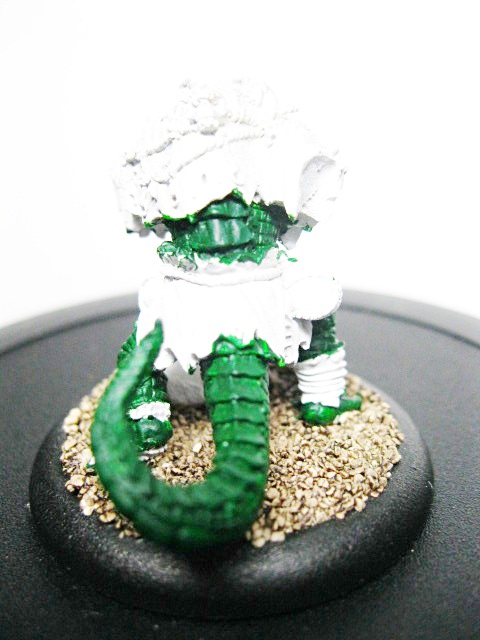
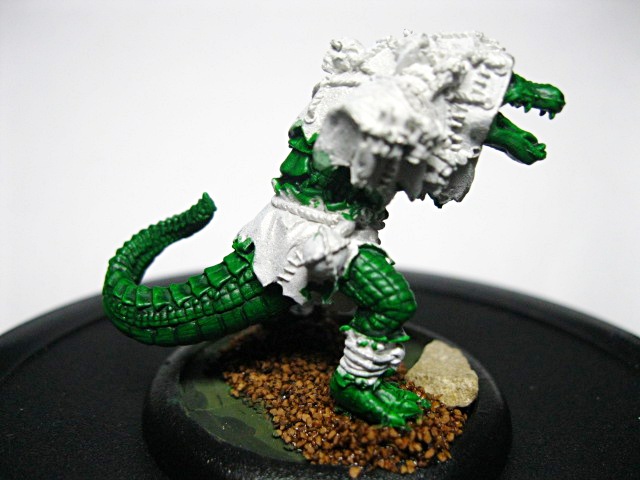
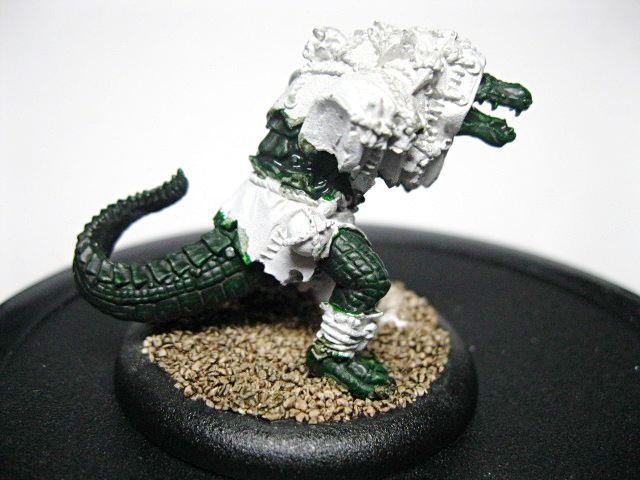
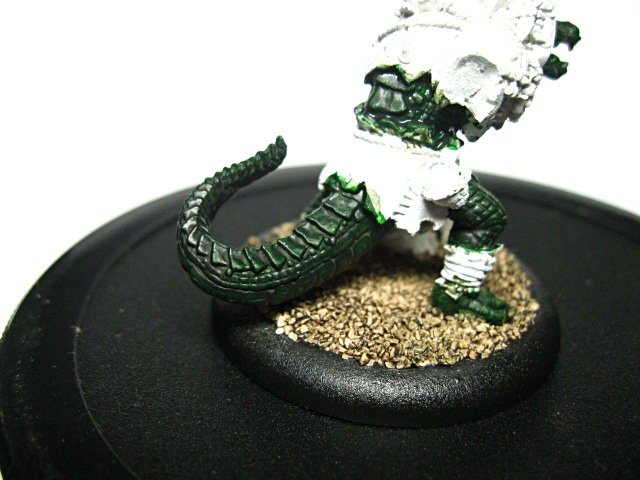
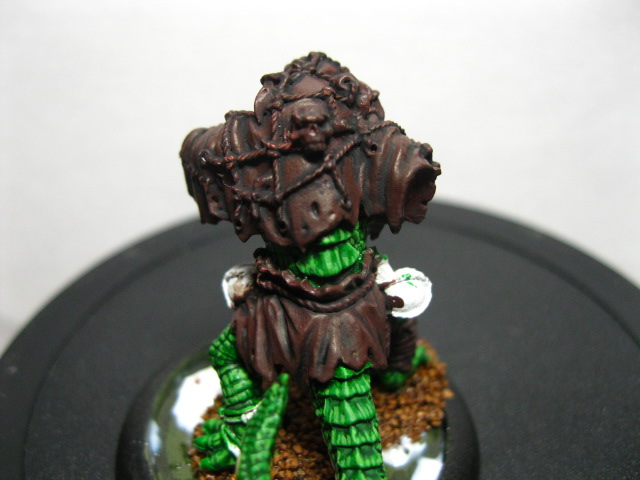
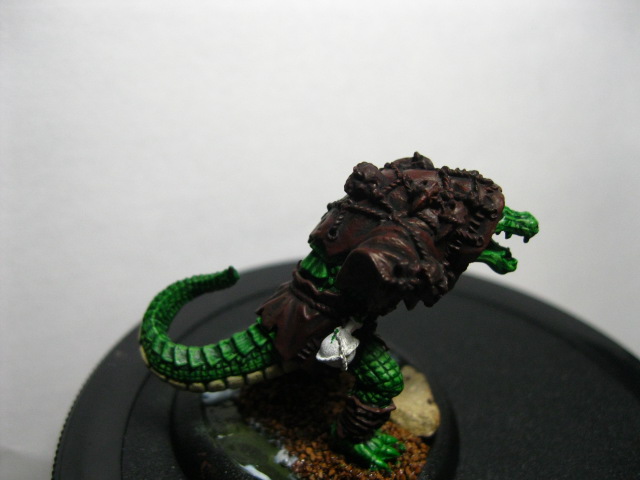
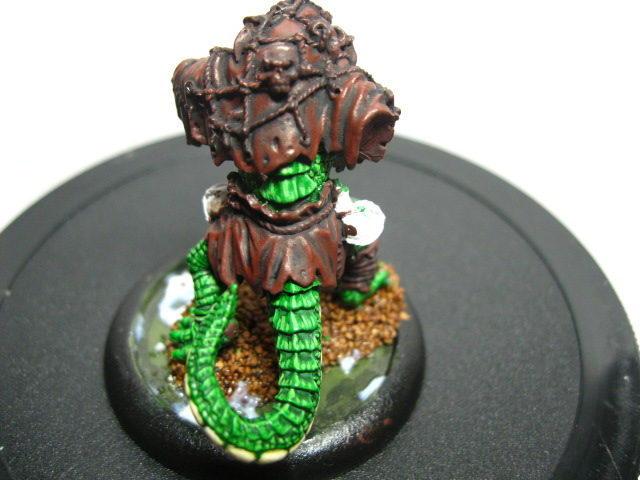
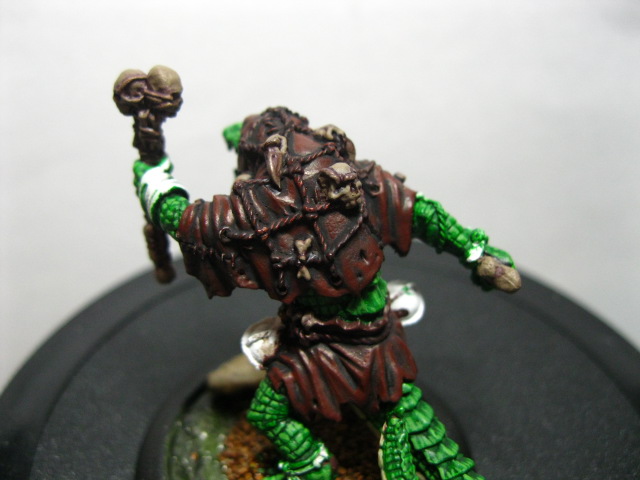
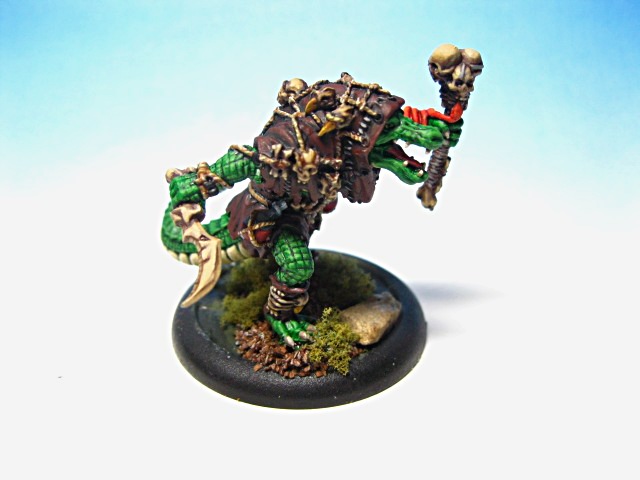
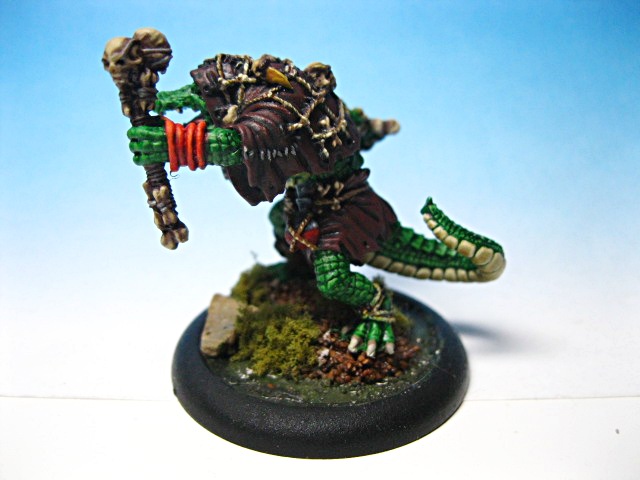
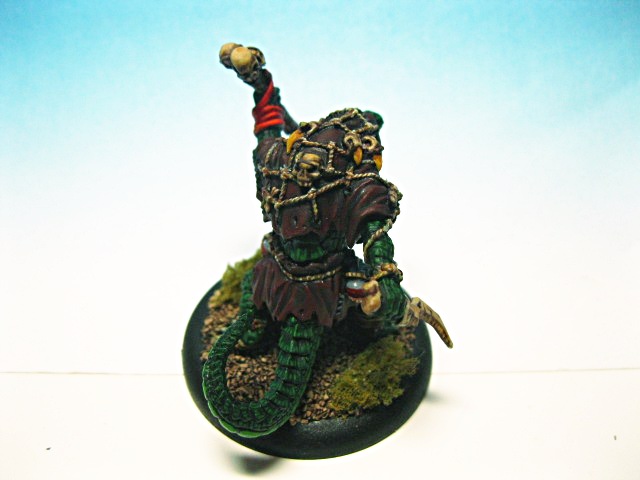
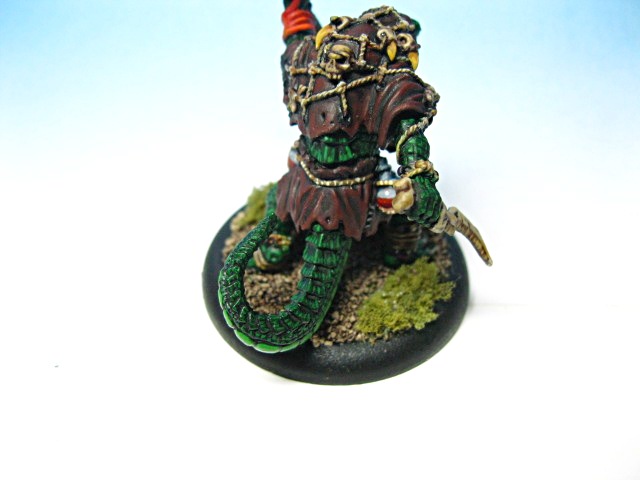
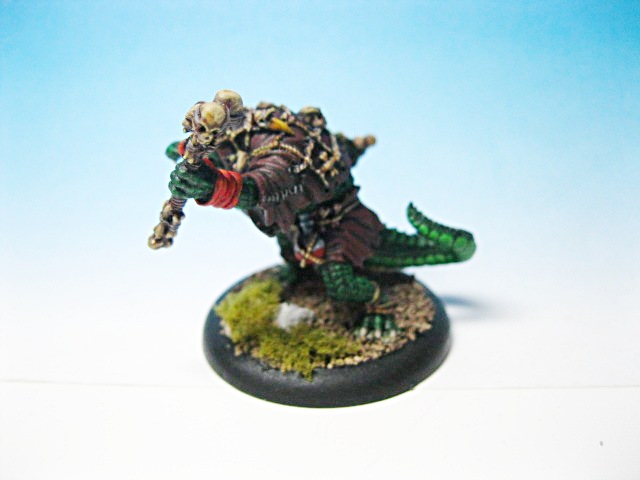
And there you have it ladies and gents. A complete walkthrough of one of the bevy of ways that these fine models can be painted. In the end this is what you will end up with if you followed the same series of steps as I did.


 I hope you enjoyed the Step-by-Step. In all honesty I am going to try and make this a semi-regular feature on the site.